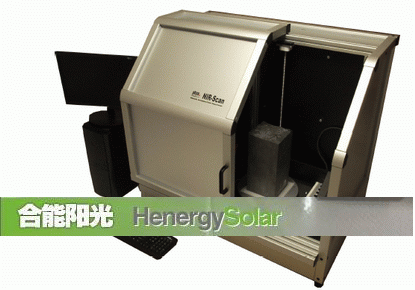
NIR Scan Block Inspection System is built for monitoring impurities inside raw and polished surface silicon blocks.
The following impurities can be explored with the machine:
Cracks, microcracks
Cracks and microcracks may occure in silicone ingots and blocks as a result of mechanicalstress. In some cases large cracks can be hidden inside the block, and cannot be visually explored from outside. IR technique shows this kind of fault clearly. On Image 1 a large inside crack is visualized by NIR-Scan. This block seems intact by visualization outside.
.gif)
Mircocracks are just seen as small spots on the images, but may cause serious problems at the slicing process.
Microcrystalline defects
These defects form when melt silicon changes phase. Its a disturbance of phase change.Prescence of this kind of defect highly degrades solar cell quality, thus further processing of block areas containing microcrystalline defects in not suggested. Image 2 shows such kind of sefect detected on the top of a raw surface block.
.gif)
Inclusions
The most common materials which form inclusions inside silicon blocks are SiC and SiN.These inclusions have different optical properties than pure Si, thus clearly can be seen on the images. Image 3 shows inclusion area on the top left.
.gif)
As inclusions, especially SiC is high hardness material, it may cause wire breaks during
slicing process, thus slicing such blocks shoul be avoided.

NIR-Scan System parameters
Sample Parameters
The NIR-Scan Block Inspection System is designed to measure Si blocks upto 210x210x450mm.
Sample holder sizes:
■156x156 standard
■210x210 standard
■Custom block with custom placement, software sample finding

Detector properties
The detector of NIR-Scan is a cooled FPA line detector. Its superb sensitivity and low noise is maintained by TEC cooling of the detector. Main issue of IR detectors is the background IR noise of the camera, this is highly reduced in this machine, which result very clear images.
On-the-fly measuring mode offers a good equilibrium between speed and sensitivity.
Throughput time of a block is around 1 minute, resolution measured on block surface is better than 0.2mm.
Step-by-Step mode offers the user to use full sensitivity of the camera without loosing even a pixel information. May be useful eg. for metallurgical Si experiments.

Detector parameters:
■ Linescan detector with 1024px horizontal resolution. Total resolution of the scanned images are 1024x2304px (2048x4608 is available soon upon request)
■On-the-fly and step by step modes selectable.
■TEC1 detector cooling (TEC3 optional)
■High quality NIR optimized optics for sharp images

Mechanics details
The base of the system is made of profile building elements, while the inside mecahnics is built up from high quality CNC engineered parts designed by Phys engineers. The motion mecahnics is designed for high durability, it uses accessories ususally used for building CNC milling machines. Such selection of elements also gives high mechanical precision for the
machine.
Mechanical resolution of horizontal movement: 0.02mm
Mechanical resolution of rotating table: 0.09”
Table gear mechanics is sized to handle even fallen blocks without shaft break. Highest load of rotation table is above 100kg.

Frame and Casing
■Dimensions: 108x77x104 (WxDxH)
■All elements are surface treated – anodising or electrostatic powder paint
■Overall weight of the main unit is 138 kgs
■Weight of accessories is 25kgs
Rotating stage
■ moved by 1 axis 50W servo motor system
■max. load over 100kg
■overcurrent protection to prevent injuries or motor burn
■step-loss correction, high resolution encoder

Lifting bridge
■ moved by 1 axis 180W servo motor system
■ overcurrent protection to prevent injuries or motor burn
■step-loss correction, high resolution encoder
■ optical end position sensing and mechanical security shut down limiters

Lightsource [Baratex 09741010-HU]
■High intensity industrial NIR halogen tube (long lifetime)
■Power: 230 VAC, 1000W
■Light intensity is software controlled
■Software overheat protection
■Forced „Laminar” cooling of lamp unit which keeps IR light unit at safe temperature and avoid burn injuries.

Eletronical parameters and working conditions
■Temperature: between 15°C and 35 °C nominal
■Humidity: between 20% and 60% , non condensing
■Power requirement: 220VAC, 2000W single phase, grounded line, Class 1 protection

Software details
The NIRVision LSC software is compatible with our earliest NIRVision versions. The
software is developed under the latest Windows 7® operating system and enables to use the
advantages of multi core CPU’s.
Basic features of the software
■ 4 side automatic measurement with sample scaling
■ 2 side quick measurement with sample scaling
■ On-the-Fly and point-by-point modes
■ Detailed detector handling and setting possibility
■ Direct stage control with rotation to any angle
■ Well visualized camera setting with semi-live images for setting up filters and lens focusing
■ Automatic evaluation
■ Software correction possibilities
■ High precision pointer on zoom image mode to find impurity locations manually
■ Integration of different features upon customer request
.


